Photographing slow shutter speed iPhone photos is a technique that you can use to add special effects to a photo. For long exposure photos, the shutter of a camera is opened for longer, so that moving parts are displayed in an unsharp manner.
For example, a slow shutter speed is used by sports photographers to create the illusion of movement. Landscape photographers use a long exposure speed to create extra atmosphere and dynamics.
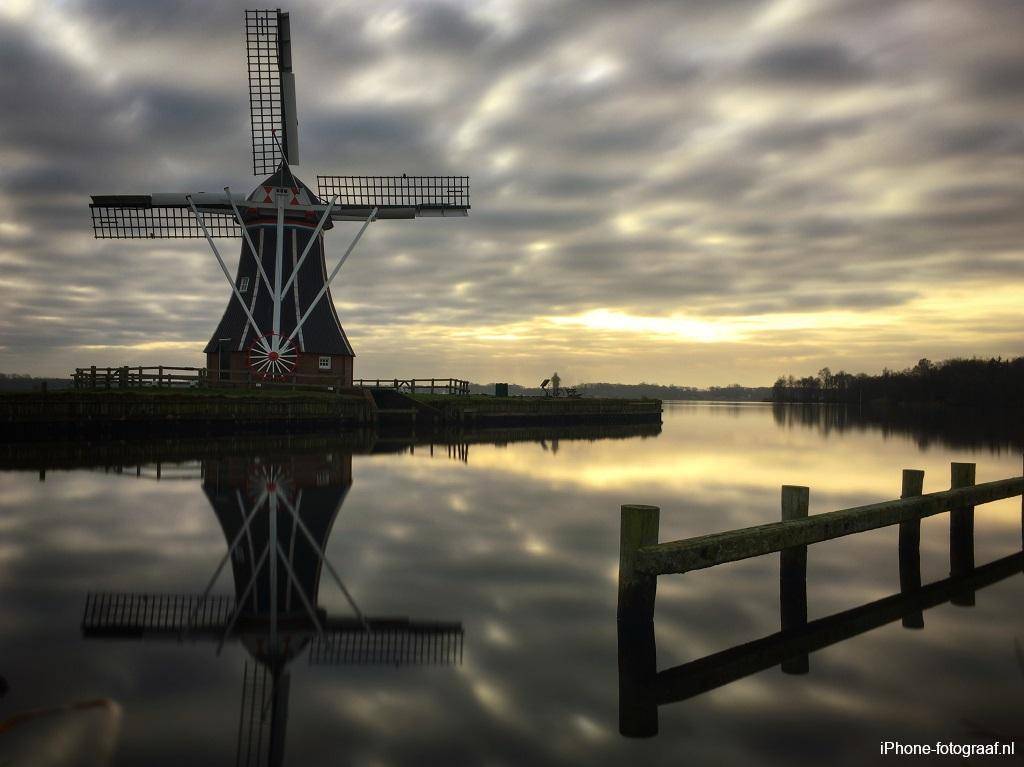
However, with the standard iPhone Camera-app you cannot set a shutter speed and the longest exposure is 1/3 of a second. If you photograph with the iPhone camera-app during the day, motion is frozen due to the fast shutter speed. The iPhone camera-app will always try to take photos with a high shutter speed. If you want to photograph movement, you need an exposure time of at least 1 second.
To use this technique, you need a camera with manual settings, such as a SLR camera. With examples and videos I tell you how you can make beautiful atmospheric long exposure iPhone photos with 4 different apps.
Content
- Slow Shutter Cam
- Live Photos mode of the iPhone Camera-app
- Adobe Lightroom CC for Mobile
- Cortex Cam
- Conclusion
- Downloads
Examples of slow shutter speed iPhone photos
You can use long exposure for example for photographing waterfalls, fountains and running water, thunderstorms and lightning, cloudy skies and light painting.
Slow Shutter speed iPhone photography with Slow Shutter Cam
Slow Shutter Cam makes multiple photos in quick succession and combines them into one photo. In this you can set the exposure time. Slow Shutter Cam automatically determines the exposure, so the photos almost always succeed in normal light conditions.
Tripod and smartphone holder
For Slow Shutter Cam you need a tripod and a smartphone holder. Use the tripod to make vibration-free photos. Because you work with a slow shutter speed, your iPhone may not move during recording. The smartphone holder is used to place the iPhone on the tripod. Usually I use a mini-tripod which I can easily take with me.
Settings
To prevent the iPhone from moving while the picture is being taken, set the self-timer to 1 second or longer. You can also use the + button of your iPhone earbuds to take the photo. Before you start you need to check whether the maximum resolution has been set.
For best results, select the compression-free TIFF file format if you want to edit the photo. With TIFF you are less likely to suffer from unsightly compression artifacts. Keep in mind that TIFF files are larger than jpeg and therefore require more storage capacity.
The daytime capture mode is Motion Blur. For the maximum effect, set Blur strenght to maximum. You leave ISO on automatic.
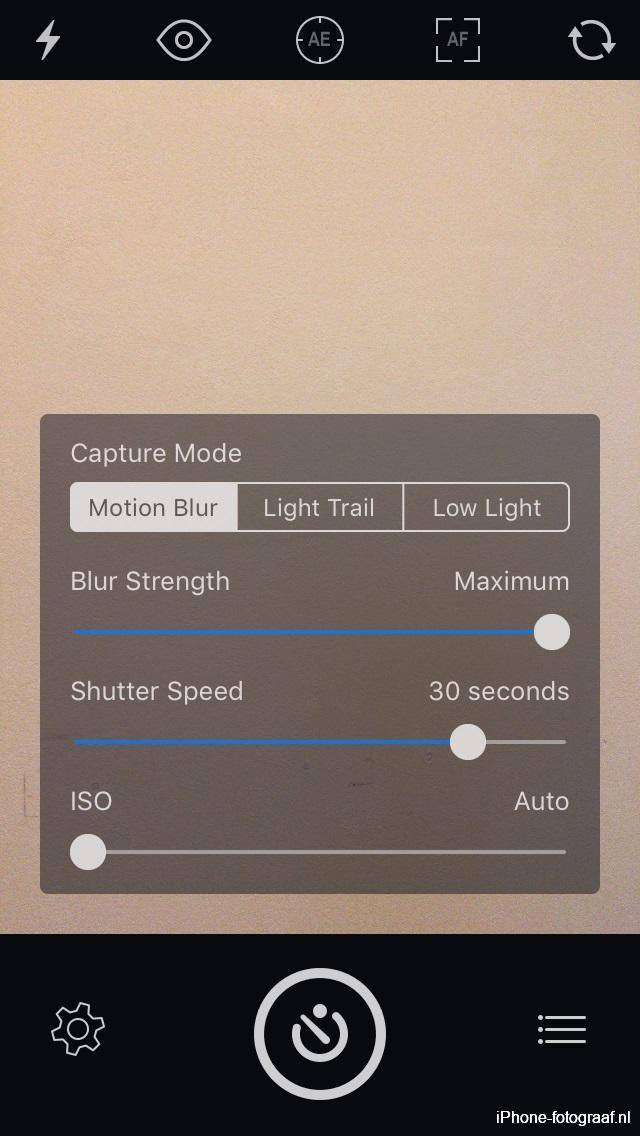
The settings of Slow Shutter Cam
Capture mode Light Trail
This video shows how you can use the Light Trail Capture Mode in the dark.
Examples of long exposure iPhone photos
All photos below are made with an iPhone 6s and edited in Snapseed. The exposure times are 30 to 60 seconds. For the first photo I have pressed the iPhone against the window of a windshield and photographed through the glass.
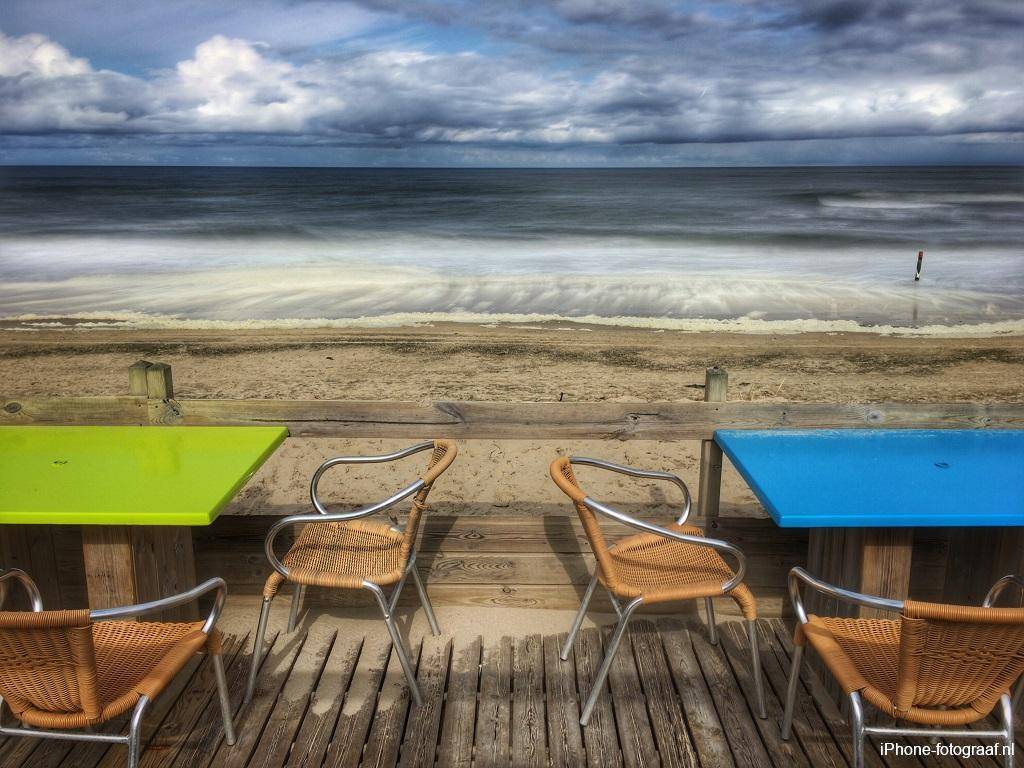
This iPhone photo of the beach was made with Slow Shutter Cam and a long exposure.
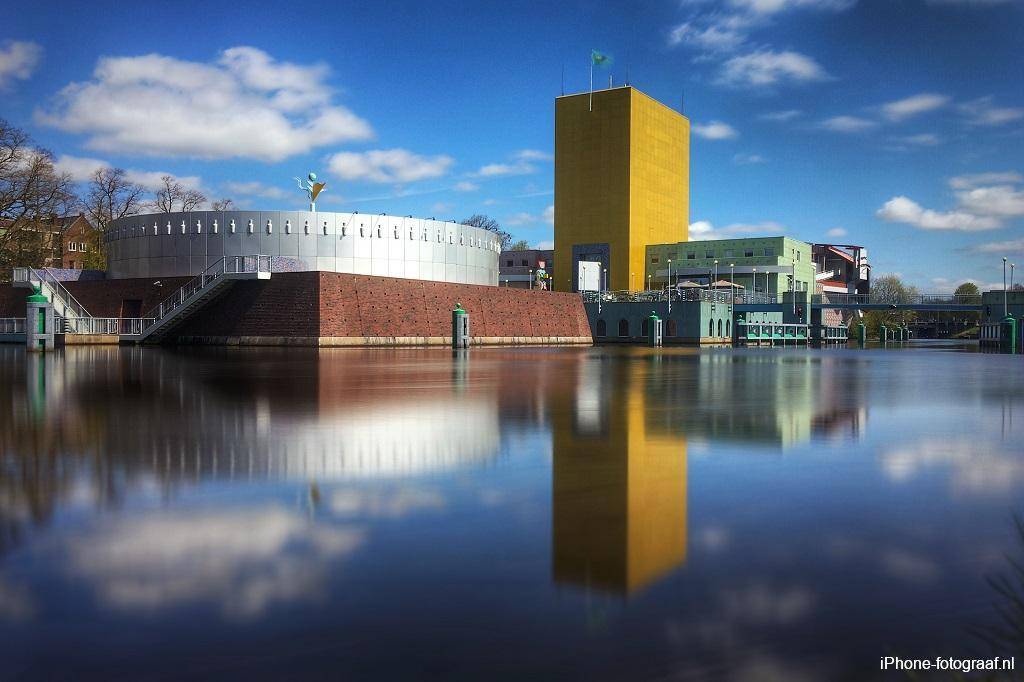
Groninger Museum. This iPhone photo was made with Slow Shutter Cam and a long exposure.
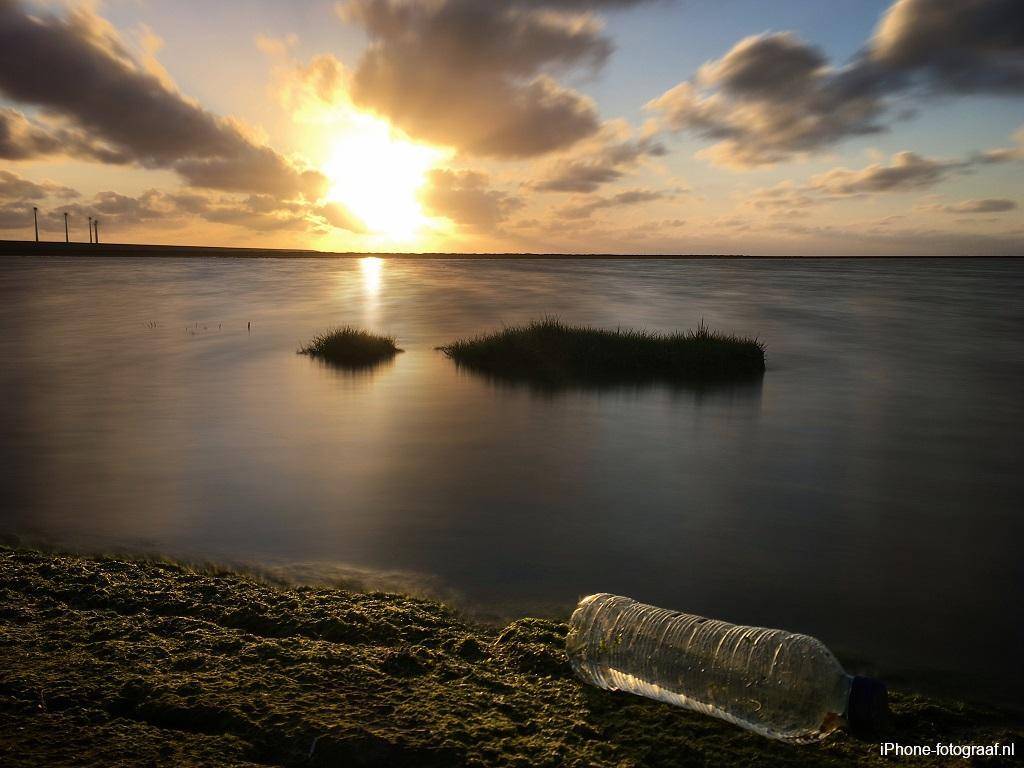
This iPhone photo of the Wadden Sea was made with Slow Shutter Cam and a slow shutter speed.
Slow shutter speed iPhone photos with Live Photos and Lightroom CC for Mobile
If you photograph a fountain or waterfall with the iPhone camera-app during the day, the motion is frozen due to the fast shutter speed. The iPhone camera-app will always try to take photos with a high shutter speed. The water drops are sharp and look like marbles. With the Live Photos function of the iPhone Camera app and the free camera app Lightroom CC Mobile you can simulate the effect of a slow shutter speed, so that the movement of the water is displayed with a milky dramatic effect. With these apps you can easily photograph motion without a tripod.
Take slow shutter speed iPhone photos with Live Photos
You first take a Live Photo and for the slow shutter speed you then apply the Live Photo effect Long exposure.
A Live Photo is a photo with 3 seconds of video with sound. To make a Live Photo, launch the iPhone Camera app and select the photo mode. The Live Photos function is switched on by default and you can turn it off by tapping the Live Photo icon at the top of your screen. A Live Photo is taken the moment you press the release button. The video recording is started 1.5 seconds before and stopped 1.5 seconds after the photo. (Keep this in mind while shooting).
Photographing with a slow shutter speed
In the photo below you can see from the yellow circle that Live Photos is switched on. You can also enable HDR or the flash.

You can focus on a specific area and thereby determine the exposure by tapping the screen. Lock the focus and exposure by keeping your finger pressed on the screen until AE/AF lock appears. You can then determine the composition without the camera focusing again and the exposure changing.
Keep your iPhone as still as possible and take the picture. The word Live appears on the screen during recording.
The Live Photo effect Long exposure
You can reach the Live Photo effects by swiping up on your photo, after which you can choose from Live (default), Loop, Bounce and Long exposure. Select Long exposure so that the individual images of the video are merged into one photo with an exposure time of 3 seconds. The moving parts are blurred.
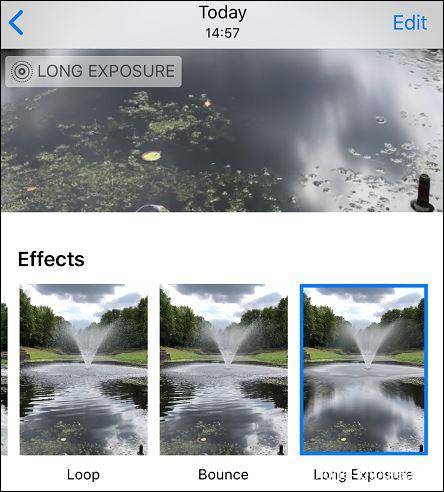
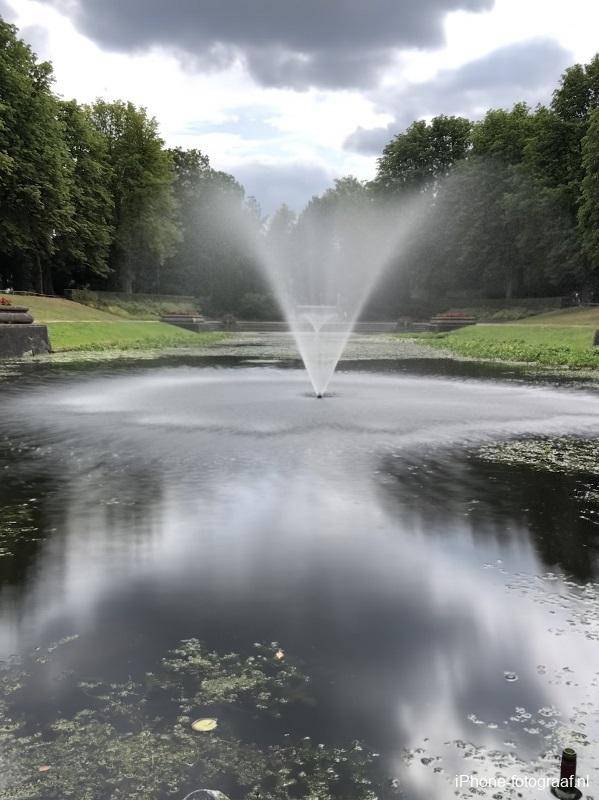
Video Live Photo-effect Long exposure
Photographing slow shutter speed iPhone photos with Lightroom CC Mobile
The free Camera app Lightroom CC Mobile has a Long exposure mode (preview), with which you can expose up to five seconds. The app then takes several photos in succession and merges them into one. From the iPhone 6S you can select the RAW file format DNG.
The settings
Select the Long exposure mode to the left of the shutter button. The DNG or JPG file format is displayed at the top of the screen and you can change it by tapping it. If you have an iPhone with a dual camera, you can tap the symbol to the right of the shutter button to switch between the wide-angle lens and the telephoto lens. Tap Sec for the exposure time (0.5 – 5 Sec). If you do not use a tripod, leave the default setting Hand Held to on.
Photographing with a slow shutter speed
You can focus on a specific area and thereby determine the exposure by tapping the screen. With horizontal swipe you can adjust the exposure compensation. Lock the exposure by tapping the lock at the bottom right, so that you can determine the composition without the camera changing the exposure.
Keep your iPhone as still as possible and take the picture. Lightroom CC takes a series of photos in quick succession during the exposure time, which are combined into one photo. The duration of the merge depends on the exposure time and file format and can be quite long.
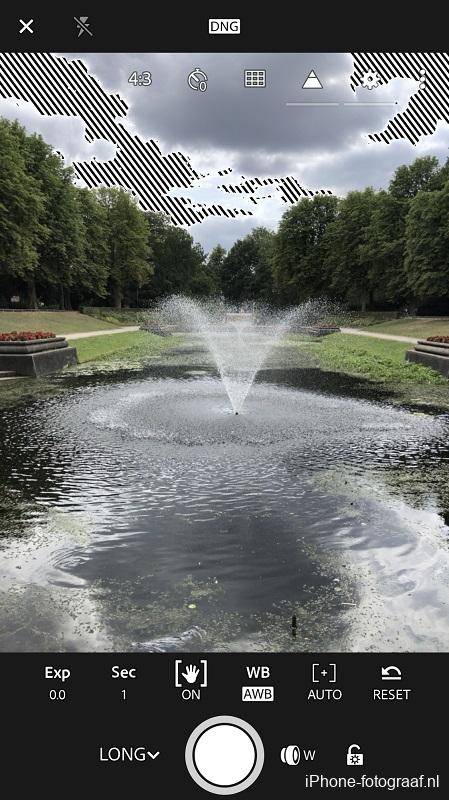
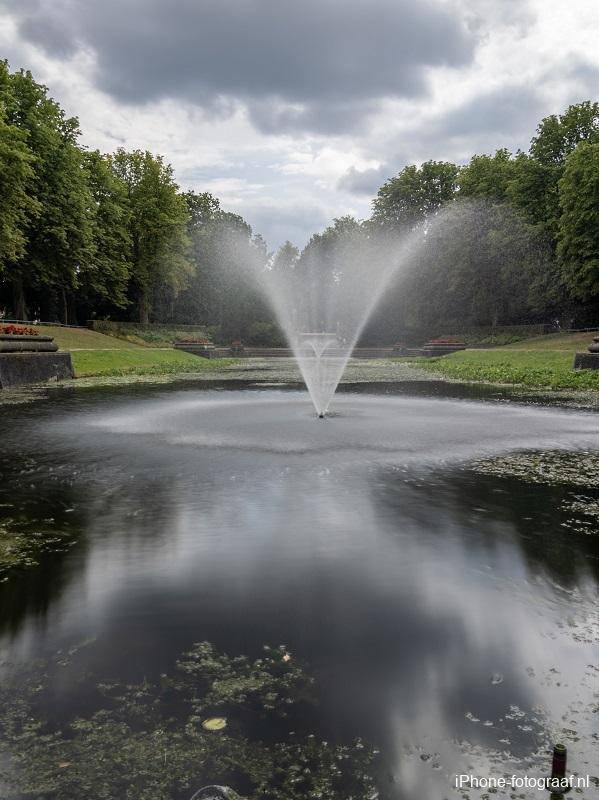
Examples of long exposure iPhone photos
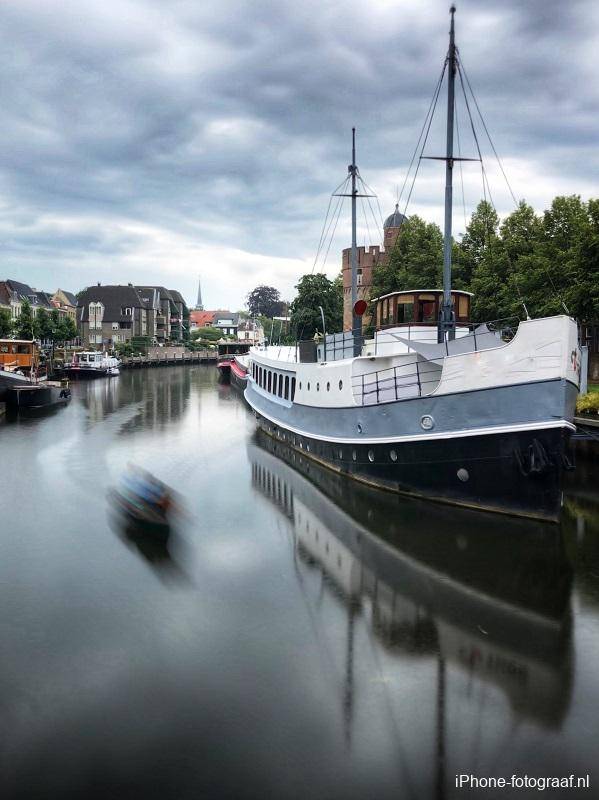
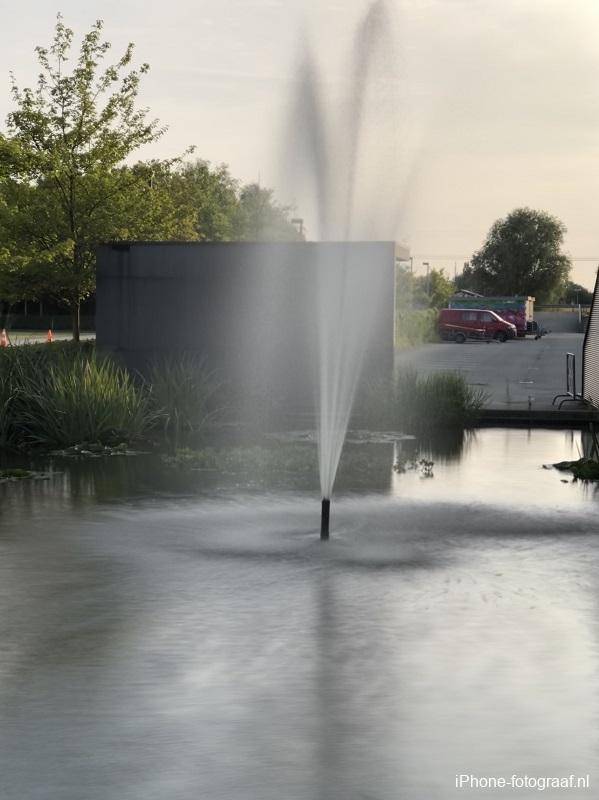
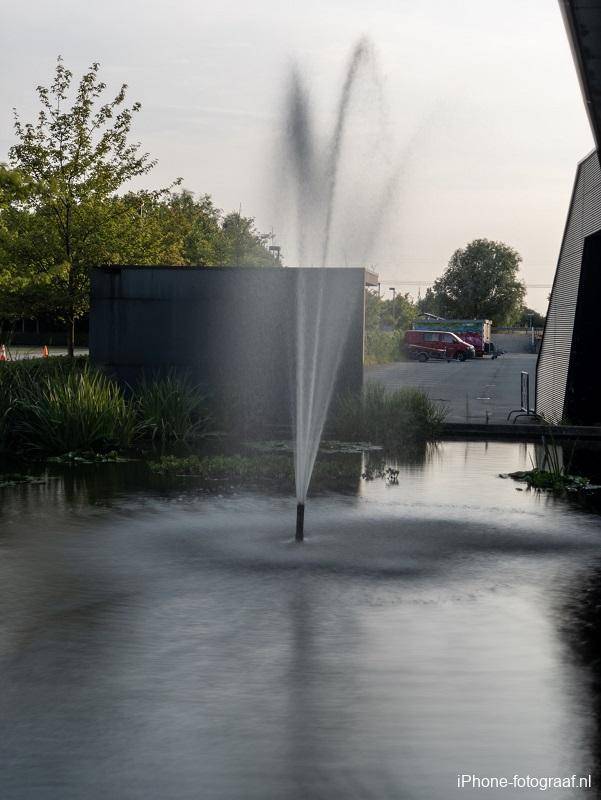
Photographing with Cortex Cam and a long exposure
For landscapes and cityscapes you can smooth the wrinkles on the water and get more reflections with a slow shutter speed. With the iPhone app Cortex Cam I managed to shoot handheld with a long shutter speed and create smooth water.
Photographing with a long exposure
Cortex Cam makes multiple RAW photos in quick succession and combines them into one photo. The iPhone 6S and later models support RAW. I use Cortex Cam for night photography, but you can also shoot with this app during the day. The time that the app needs to take the photos on my iPhone 8 Plus are a few seconds and that can be sufficient to create the effect of a long exposure. When there is a lot of wind and movement in the water, then you need a much longer exposure. Furthermore, it is important that you keep your iPhone still while you are photographing and that the subject does not move.
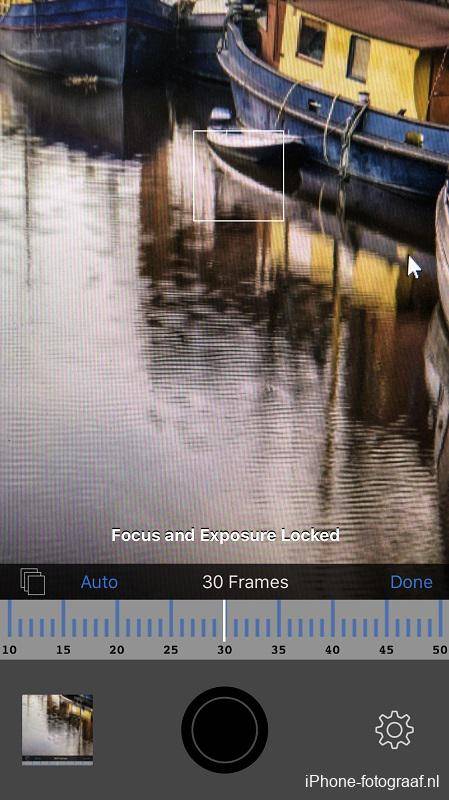
You can focus on a specific area and thereby determine the exposure by tapping the screen. Lock the focus and exposure by keeping your finger pressed on the screen until Focus and Exposure Locked appears. You can then determine the composition without the camera focusing again and the exposure changing.
The settings
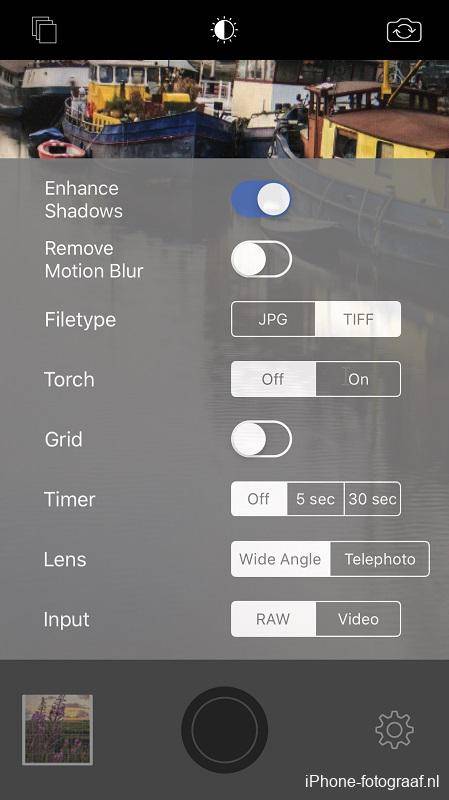
On the pictures below you can see the settings that I used. The file format is set to TIFF. You can also set the number of photos by tapping the top left button, but I left that on Auto.
Examples of long exposure iPhone photos
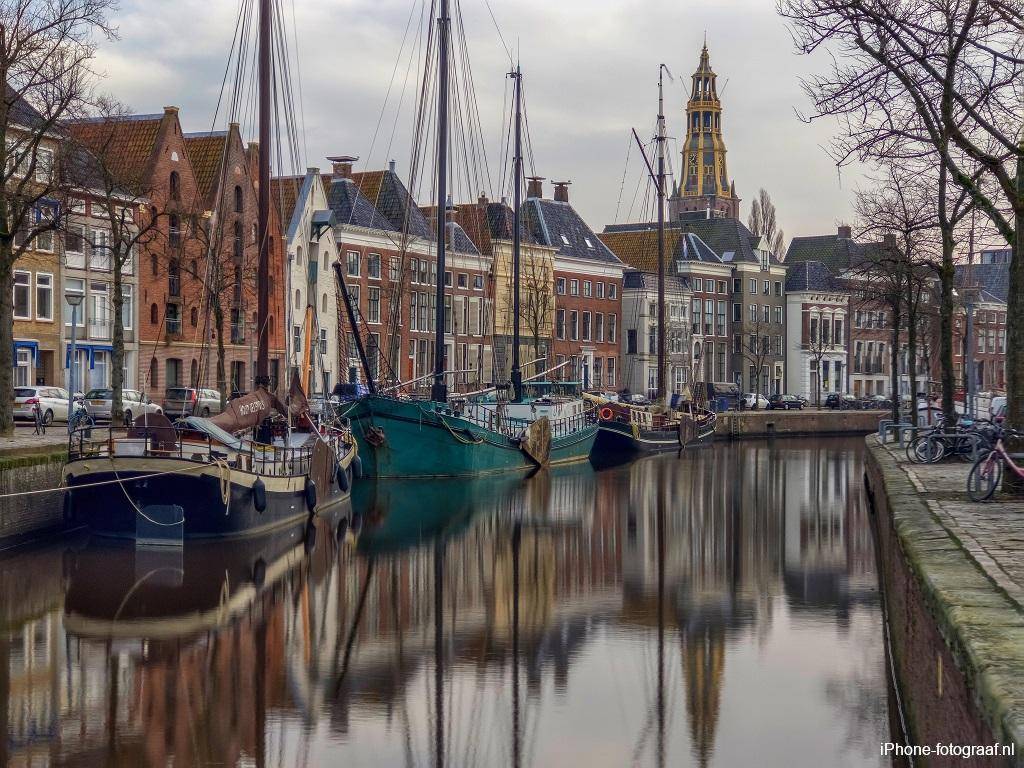
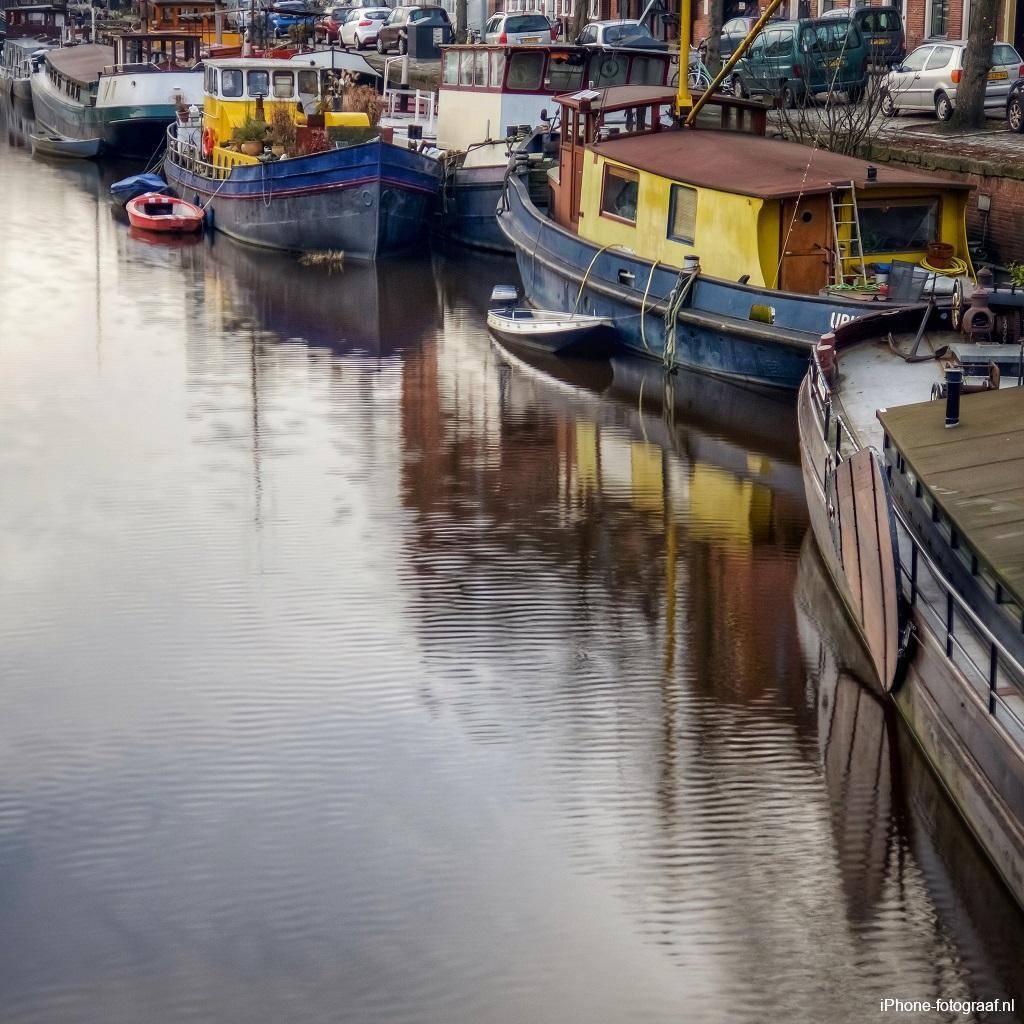
I have made these Cortex Cam examples in Groningen on a day with little wind and as you can see, it has been reasonably successful to smooth the water. I edited the photos on my iPad in Adobe Lightroom Mobile and Snapseed.
- The first photo is from the Hoge der A with beautiful historic buildings and some classic sailing boats.
- The second photo is from the Noorderhaven, where are many boats in the winter.
- The last photos are of houseboats on the Turfsingel and the Schuitendiep.
Hoge der A
Noorderhaven
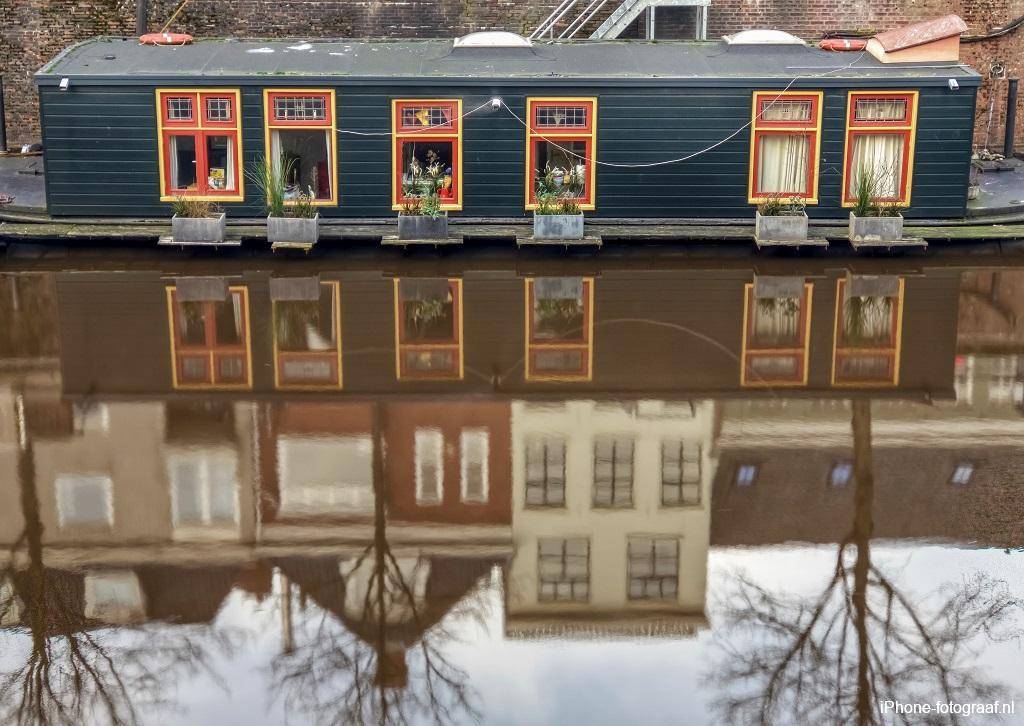
Turfsingel
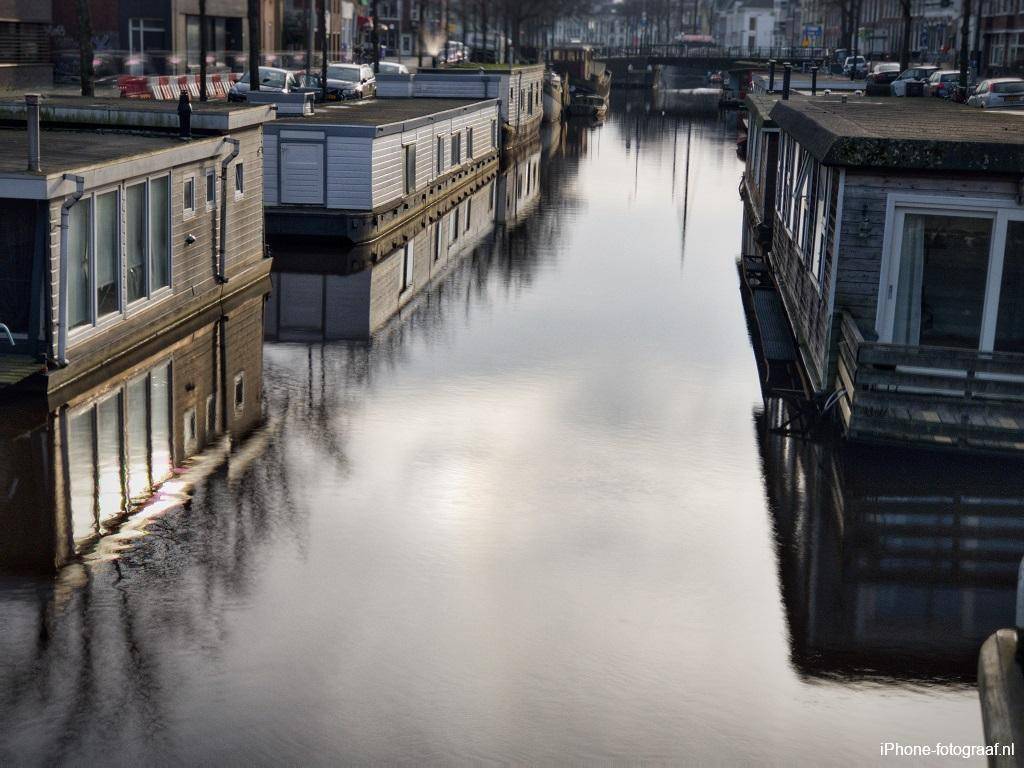
Schuitendiep
Conclusion
With the tested apps you can easily simulate the effect of a long shutter speed and thus photograph movement. I use Slow Shutter Cam for exposures longer than 5 seconds. For shorter exposures, I prefer Live Photos or Adobe Lightroom CC. I have listed the various characteristics for you.
Slow Shutter Cam
- You need a tripod.
- For exposures longer than 5 seconds.
- The exposure time is adjustable. Even bulb is possible.
- You have 3 capture modes for specific lighting conditions.
Live Photo effect Long exposure
- You don’t need to install an additional app.
- Works fast.
- You can use the flash.
- HDR is available.
- The Live Photo Long exposure effect makes the format slightly smaller to remove camera shake.
- You can shoot handheld.
Lightroom CC for Mobile
- RAW file format DNG is available.
- Exposure time is adjustable to 5 seconds.
- You can shoot handheld.
Cortex Cam
- Fully automatic.
- Is intended for night photography.
- You can shoot handheld.
Downloads
Slow Shutter Cam App Store
Adobe Lightroom CC Mobile App Store
Cortex Camera App Store
Snapseed App Store
Read also my blog about light trails or go to the overview with all iPhone photography blogs.